Before we begin to edit our title sequence it is important we researched the order titles appear. We did this in class, analysing the Catch Me If You Can title sequence, establishing the order each title appeared. We then applied the order to fit our film Hypnosis. We decided to also view some title sequences, and see the order in which there titles appear and base it around what we notice. We also tried to follow the codes and conventions that arise with the order of the titles.
This is the order in which our credits will appear in our sequence:
1 - Studio logo - Lionsgate
2 - Production company - A Lionsgate production
3 - Producer - An Oren Peli film
4 - Film title - Hypnosis
5 - Actor name - Lucy Ford
6 - Actor name - Dylan Webb
7 - Actor name - Kate Kurton
8 - Actor name - Alex Easlea
9 - Actor name - Simone Chapman
10 - Casting - Nancy Nayor (worked on The Grudge)
11 - Costume designer - Kristin Burke (worked on Insidious)
12 - Music - John Kurlander (worked on Woman In Black)
13 - Editor - James Cowan (worked on The Possession)
14 - Director of Photography - Daniel Pearl (worked on Friday the 13th
15 - Writers - Jon Spaihts (worked on Prometheus)
16 - Director - Oren Peli
Showing posts with label journal. Show all posts
Showing posts with label journal. Show all posts
Thursday, 17 January 2013
Creating the titles
To create the titles, we decided to use Adobe After Effects due to being sort of familiar with After Effects, and looking into other After Effects videos being creating, we noticed they looked exceptionally professional and decided this software would be best for us. Dylan has made the titles and animations and this is how he did it.
This is how Dylan made the title for 'Lionsgate Pictures Presents':

Firstly, he had to create a new project. He did this by going to 'File' then 'New' then 'New Project'. Once there, all he had to do with click on the button.

After that he had to place the video he was going to edit for the title, into After Effects. He did this by selecting 'Edit' at the top, then going to 'Import' and finally going to 'File'.
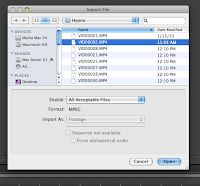
Once selecting 'File', it brought up a menu with the video clips he can use for the placing the titles onto. To select one, he had to click on the once he wanted, which was number two, then click 'Open'.

This then placed the clip into After Effects, and will now allow him to drag it into the editor and begin working on it.
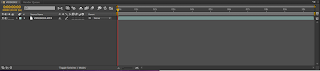
This is what it looks like once it has been dragged into the editor.

And here is the video preview for the clip once it has been placed into the editor.

Now he had to add in the text to display the title 'Lionsgate Pictures Presents'. To do this, he had to go to the editor where the video had been placed, right click on the mouse, then click 'New' and then 'Text'.

Once the video and text had been placed into the editor and positioned, He then moved onto adding the effect to the text to make it animated. To do this, there was a little menu next to the video that stated 'Effects & Presents'. Once there, I found the effect he wanted called 'Evaporated'.

Then he dragged over the effect on top of the text layer, let it load properly, then played it to see how it worked. This is what the effect looked like.

After viewing and sorting out any necessary tweaks to the text animation, he then had to export the clip so it would be suitable for Final Cut Pro. To do this, he had to go to 'File' again, then to 'Export' and 'Add to Render Queue'.

This then took him to this menu, where he can change the name, format and anything else.

After all that, all he had to do was click 'Render' then his clip would be complete and be used for our title sequence.
This is how Dylan made the title for 'Lionsgate Pictures Presents':

Firstly, he had to create a new project. He did this by going to 'File' then 'New' then 'New Project'. Once there, all he had to do with click on the button.

After that he had to place the video he was going to edit for the title, into After Effects. He did this by selecting 'Edit' at the top, then going to 'Import' and finally going to 'File'.

Once selecting 'File', it brought up a menu with the video clips he can use for the placing the titles onto. To select one, he had to click on the once he wanted, which was number two, then click 'Open'.

This then placed the clip into After Effects, and will now allow him to drag it into the editor and begin working on it.

This is what it looks like once it has been dragged into the editor.

And here is the video preview for the clip once it has been placed into the editor.

Now he had to add in the text to display the title 'Lionsgate Pictures Presents'. To do this, he had to go to the editor where the video had been placed, right click on the mouse, then click 'New' and then 'Text'.

Once the video and text had been placed into the editor and positioned, He then moved onto adding the effect to the text to make it animated. To do this, there was a little menu next to the video that stated 'Effects & Presents'. Once there, I found the effect he wanted called 'Evaporated'.

Then he dragged over the effect on top of the text layer, let it load properly, then played it to see how it worked. This is what the effect looked like.

After viewing and sorting out any necessary tweaks to the text animation, he then had to export the clip so it would be suitable for Final Cut Pro. To do this, he had to go to 'File' again, then to 'Export' and 'Add to Render Queue'.

This then took him to this menu, where he can change the name, format and anything else.
After all that, all he had to do was click 'Render' then his clip would be complete and be used for our title sequence.
Friday, 11 January 2013
Filming our Sequence Part 3
While reviewing our clips that we had filmed, and begun to to decide which we would use, and how we would edit them, we noticed that we did not have a sufficient amount of shots to use for placing typography on - as we wanted to place our titles on clips of the scenery. We realised as a group, that we would need to go back to the woods and get the necessary shots for the titles.
We decided to go out during lesson time, due to making it easier for us to collect the equipment we need, and it would make it easier for us to all meet up and plan due to obviously being in the same classroom. Once we planned and collected the equipment, we set out to visit the woods again. When we arrived, we begun exploring the different locations in the woods, to get the best possible shots for out title sequence, and to make the shots diverse.
We faced the problem of difficult weather conditions, which left the floor full of puddles and mud, and I occasionally got 'attacked' by branches and stinging nettles - but we braved this and got the shots we needed and this time, made sure we had as many shots as possible so we wouldn't have to return to the woods anytime soon.
Asking the audience

We compiled this tally chart and asked some people what font they liked the best out of the top six ones we chose. We managed to choose these fonts because they all had that creepy, distorted look that we wanted. We realised that with our name, we had to be careful with what font we chose. This is because if we chose a different style, the whole audiences perception of the film could be changed and they may think that it is of a different genre. Font four received the most votes, and it was also the one that we liked the most so it was the one that we went with.
Saturday, 29 December 2012
Filming our sequence part 2


Monday, 17 December 2012
Filming at Oxleas part 1
To film our sequence, we had to go to the set location we selected prior to filming. We decided, since we were doing the horror/slasher genre, we wanted a creepy, eery location. We picked the woods as this fit the criteria of the location we wanted. The woods are often a typical setting for a horror film making it instantly recognisable. Before going off to our location, we made sure we had all the equipment, which we were able to do with some complications; such as problems with the weapon, tri-pod issues and rope issues. We managed to resolve them in the end with Simone providing the knife, me being able to locate a tri-pod (we forgot to get one from school) and kate finding some rope to use during filming.
Once we got to our location, we had to choose the right location in the woods that would fit our imagination of our woods. We selected a location that was not over crowded by trees, and had a decent amount of walking space. Since I was in charge of location, I had the decision where we started filming, with the help and opinions of Kate and Dylan. Kate set up the positioning of the camera, and decided where people should enter and leave and the different camera angles, whereas Dylan being the director, oversaw these decisions and had to see if the decisions being made where ultimately good enough - which all were and there were no problems.
Once we had picked the location we started to film the walking, and running clips for our film. We took lots of shots so we had lots of choice when we began editing and so we wouldn't have to go back again. Once we finished filming, we looked through and watched the clips to see if they looked good.
Monday, 19 November 2012
Notes on the genre: horror.
Our genre for our film 'Hypnosis' is horror and so we had to look into the codes and conventions of horror films. This is so we can make the best title sequence as possible, ensuring we follow all of the codes and conventions.
The typical iconography of a horror film is:
Props:
The typical iconography of a horror film is:
Props:
- Knives
- Mask,
- Crucifix
- Sharp objects that penetrate or dismember
- Cloak
- Blood
- Two-way mirrors
Iconic elements:
- Full moon
- Graveyards
- Large houses
- Fog
- Macabre
- Bad weather
- Coffin
- Suburban areas
- Forrest/woods
- Forbidden places
- Cellars
- Enclosed spaces
- Deserted areas
- 'Off-map' locations
- Country lanes
- Villains that never die
- Virginal character
- Sensitive guy
- Social outcast
- Final Girl
- Monster/Human Monster
Typical narratives:
- Revenge
- Possession/Demon
- Slasher
- Paranormal/Ghosts
- Psychological
- Road trips to secluded place
- Obsession
- Virus/Apocalypse
Typical Style elements:
- Sequences of suspense
- Close ups
- Hand held
- POV
- Over the shoulder
- Dutch tilt
- Dark lighting
- Shadow
- Silence/Loud noises
- Dramatic music
- Parallel music
Typical Themes:
- Man V Nature
- Entrapment
- Religion
- Science
- Breakdown of society
Sunday, 18 November 2012
Lesson Three: Preparing our pitch.
We prepared our pitch for our film idea using Prezi. We all contributed to presentation, Kate did the typing of all the different sections of the prezi such as; the narrative, target audience, cast list etc. Dylan did the research into other similar films, he looked at their budgets and worldwide profit so we could base our one on it. Finally, I did some research into fonts that we could use for our film and created a small animation as an example of what it could look like. I also helped with the research into similar films and contributed with what we wrote.
Lesson Two: Coursework groups and ideas
We were asked to get into our coursework groups, I went with Kate and Dylan. We discussed our film ideas that we came up with over half term and decided on Dylan's idea of an invisible killer who can control minds as we had a few ideas for the title sequence and we all liked the idea.
We developed his idea further into something that we believed we could easily work with.
We developed his idea further into something that we believed we could easily work with.
Lesson One: Type Fonts
We started to look at type fonts and the importance of it in the film industry. We were shown different type fonts and had to identify what film they came from. This confirmed to us how iconic certain fonts can be. Then we had to analise a second title sequence as part of our research and planning. Finally, we learnt about the important codes and conventions of title sequences preparing us for our coursework.
Subscribe to:
Posts (Atom)