To create the titles, we decided to use Adobe After Effects due to being sort of familiar with After Effects, and looking into other After Effects videos being creating, we noticed they looked exceptionally professional and decided this software would be best for us. Dylan has made the titles and animations and this is how he did it.
This is how Dylan made the title for 'Lionsgate Pictures Presents':

Firstly, he had to create a new project. He did this by going to 'File' then 'New' then 'New Project'. Once there, all he had to do with click on the button.

After that he had to place the video he was going to edit for the title, into After Effects. He did this by selecting 'Edit' at the top, then going to 'Import' and finally going to 'File'.
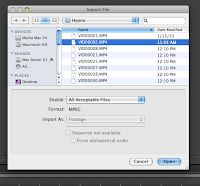
Once selecting 'File', it brought up a menu with the video clips he can use for the placing the titles onto. To select one, he had to click on the once he wanted, which was number two, then click 'Open'.

This then placed the clip into After Effects, and will now allow him to drag it into the editor and begin working on it.
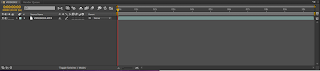
This is what it looks like once it has been dragged into the editor.

And here is the video preview for the clip once it has been placed into the editor.

Now he had to add in the text to display the title 'Lionsgate Pictures Presents'. To do this, he had to go to the editor where the video had been placed, right click on the mouse, then click 'New' and then 'Text'.

Once the video and text had been placed into the editor and positioned, He then moved onto adding the effect to the text to make it animated. To do this, there was a little menu next to the video that stated 'Effects & Presents'. Once there, I found the effect he wanted called 'Evaporated'.

Then he dragged over the effect on top of the text layer, let it load properly, then played it to see how it worked. This is what the effect looked like.

After viewing and sorting out any necessary tweaks to the text animation, he then had to export the clip so it would be suitable for Final Cut Pro. To do this, he had to go to 'File' again, then to 'Export' and 'Add to Render Queue'.

This then took him to this menu, where he can change the name, format and anything else.

After all that, all he had to do was click 'Render' then his clip would be complete and be used for our title sequence.
This is how Dylan made the title for 'Lionsgate Pictures Presents':

Firstly, he had to create a new project. He did this by going to 'File' then 'New' then 'New Project'. Once there, all he had to do with click on the button.

After that he had to place the video he was going to edit for the title, into After Effects. He did this by selecting 'Edit' at the top, then going to 'Import' and finally going to 'File'.

Once selecting 'File', it brought up a menu with the video clips he can use for the placing the titles onto. To select one, he had to click on the once he wanted, which was number two, then click 'Open'.

This then placed the clip into After Effects, and will now allow him to drag it into the editor and begin working on it.

This is what it looks like once it has been dragged into the editor.

And here is the video preview for the clip once it has been placed into the editor.

Now he had to add in the text to display the title 'Lionsgate Pictures Presents'. To do this, he had to go to the editor where the video had been placed, right click on the mouse, then click 'New' and then 'Text'.

Once the video and text had been placed into the editor and positioned, He then moved onto adding the effect to the text to make it animated. To do this, there was a little menu next to the video that stated 'Effects & Presents'. Once there, I found the effect he wanted called 'Evaporated'.

Then he dragged over the effect on top of the text layer, let it load properly, then played it to see how it worked. This is what the effect looked like.

After viewing and sorting out any necessary tweaks to the text animation, he then had to export the clip so it would be suitable for Final Cut Pro. To do this, he had to go to 'File' again, then to 'Export' and 'Add to Render Queue'.

This then took him to this menu, where he can change the name, format and anything else.
After all that, all he had to do was click 'Render' then his clip would be complete and be used for our title sequence.
No comments:
Post a Comment